React Three Fiber를 선택한 이유
현재 일본 파견회사에서 약 4년 정도 일하고 있는데,
안 그래도 낮은 연봉이 인상도 잘 안될뿐더러, 한심한 사장을 보고 앞으로의 비전도 없다고 느꼈기 때문에 (대부분의 파견회사가 여기에 해당되겠지만) 전직을 준비하려고 웹 포트폴리오를 작성하는 중이다.
그런데 어떻게 포트폴리오를 작성하면 될까 하고 구글링을 하던 중 아래 사이트를 발견했다.
Bruno Simon - Creative developer
Creative developer living in Paris, freelancer, former lead developer at Immersive Garden, former developer at Uzik and teacher.
bruno-simon.com
2D 웹사이트만 생각했던 나에게 이 사이트는 조금 과장해서 충격적이었다.
대학 시절 전공상 3D 프로그램을 질리도록 사용했었는데, 당시 3D 프로그램 다루는 것을 좋아하기도 했고 해서 최근까지도 경험을 살릴 방법이 없을까 하고 미련을 못 버리던 차였다.
기존의 경험도 살릴 수 있고 남들과 차별화를 두고 싶다는 마음도 있기 때문에, 나도 3D웹사이트를 작성하기로 결심했다.
3D웹사이트를 만들기 위해서는 JavaScript의 라이브러리인 three.js를 사용하면 된다.
Three.js – JavaScript 3D Library
threejs.org
그런데 내가 준비하는 건 리액트 + 타입스크립트 웹사이트라, 바닐라 JS 코드가 섞이는 것은 별로 원하지 않는다.
다행히도, 리액트에는 React Three Fiber라는 three.js와 유사한 라이브러리가 있다.
그래서 일단 React Three Fiber를 기초부터 공부한 후, 웹 사이트에도 적용해보고자 한다.
https://docs.pmnd.rs/react-three-fiber/getting-started/introduction
React Three Fiber Documentation
React-three-fiber is a React renderer for three.js
docs.pmnd.rs
초기설정
React + TypeScript
일단은 새 리액트 앱을 생성한다.
나는 타입스크립트도 사용할 예정이기 때문에 끝에 --template typescript를 붙였다.
npx create-react-app <APP이름> --template typescript앱 작성이 완료되면 초기 설정을 하자.
Eslint
일단은 Eslint부터.
코드 에러를 검사, 수정해 주는 Eslint는 앱 생성 시마다 넣어준다.
npm install eslint --save-devEslint 초기 설정을 해주자.
npm init @eslint/config나는 다음과 같이 선택했다.
? How would you like to use ESLint? ...
  To check syntax only
> To check syntax and find problems
  To check syntax, find problems, and enforce code style
? What type of modules does your project use? ...
> JavaScript modules (import/export)
CommonJS (require/exports)
None of these리액트나 Vue.js를 사용하지 않는다면 None of these를 선택해 주자.
? Which framework does your project use? ...
> React
  Vue.js
  None of these
나는 타입스크립트를 사용할 예정이라, Yes로.
Does your project use TypeScript? » No / YesBrowser.
? Where does your code run? ...  (Press <space> to select, <a> to toggle all, <i> to invert selection)
√ Browser
√ Node
? What format do you want your config file to be in? ...
> JavaScript
YAML
JSON이것도 설치해 준다.
The config that you've selected requires the following dependencies:

eslint-plugin-react@latest @typescript-eslint/eslint-plugin@latest @typescript-eslint/parser@latest
? Would you like to install them now? » No / Yes
실무에서는 yarn을 사용하기 때문에 yarn으로 할까 하다가, 개인적으로는 npm에 익숙해져 있기 때문에 npm을 선택했다.
이걸로 Eslint 초기 설정은 완료.
? Which package manager do you want to use? ...
> npm
  yarn
  pnpm
Eslint를 자동 적용하고 싶다면, /.vscode/settings.json을 추가해서 아래 설정을 추가하면 된다.
{
  "editor.codeActionsOnSave": {
    "source.fixAll": true
  },
  "editor.formatOnSave": true,
  "eslint.validate": ["javascript", "javascriptreact", "html"]
}
React Three Fiber
이제 three와 React Three Fiber를 설치할 차례이다. 아래의 커맨드를 실행해 주자.
타입 스크립트를 사용한다면 @types/three도 같이 설치해주어야 한다.
안 그러면 프로젝트 실행 시 @types/three를 설치하라는 에러가 뜰 것이다.
npm install --save three @react-three/fiber
npm install --save-dev @types/three
튜토리얼: 정육면체와 선, 텍스트 표현하기
three.js
리액트에서 three.js를 사용해, 정육면체와 선, 텍스트를 표현해 보자.
내 경우에는 공식 도큐먼트를 참고하여 코드를 작성하였다.
three.js를 사용할 경우, Scene, Camera, Renderer를 따로 설정해주어야 하고, 메쉬가 추가될 때마다 장면에 일일이 추가해야 할 필요가 있다.
import * as THREE from "three";

import React, { useEffect, useRef } from "react";

import WebGL from "three/examples/jsm/capabilities/WebGL";

const App = () => {
  const mountRef = useRef<HTMLDivElement>(null);

  useEffect(() => {
    // Scene 생성
    const scene = new THREE.Scene();
    // Camera 생성
    const camera = new THREE.PerspectiveCamera(
      75,
      window.innerWidth / window.innerHeight,
      0.1,
      1000
    );
    // Renderer 생성
    const renderer = new THREE.WebGLRenderer();
    renderer.setSize(window.innerWidth, window.innerHeight);

    const elm = mountRef.current;
    elm?.appendChild(renderer.domElement);

    camera.position.z = 5;
    camera.lookAt(0, 0, 0);

    // 박스 생성
    const boxGeometry = new THREE.BoxGeometry(1, 1, 1);
    const boxMaterial = new THREE.MeshBasicMaterial({ color: 0x00ff00 });
    const boxMesh = new THREE.Mesh(boxGeometry, boxMaterial);
    boxMesh.position.x = -2;
    // 장면에 박스 추가
    scene.add(boxMesh);

    // 선 생성
    const lineMaterial = new THREE.LineBasicMaterial({ color: 0x0000ff });
    const points = [
      new THREE.Vector3(0, 0, 0),
      new THREE.Vector3(1, 1, 0),
      new THREE.Vector3(2, 0, 0),
    ];
    const lineGeometry = new THREE.BufferGeometry().setFromPoints(points);
    const line = new THREE.Line(lineGeometry, lineMaterial);
    // 장면에 선 추가
    scene.add(line);

    // 조명 생성
    const light = new THREE.DirectionalLight(0xffffff, 0.02);
    light.position.set(1, 1, 1);
    // 장면에 조명 추가
    scene.add(light);

    const animate = () => {
      // Window.requestAnimationFrame():
      //  브라우저에 수행하기를 원하는 애니메이션을 알리고,  다음 리페인트 바로 전에 브라우저가 애니메이션을 업데이트할 지정된 함수를 호출하도록 요청
      //  https://developer.mozilla.org/ko/docs/Web/API/window/requestAnimationFrame
      requestAnimationFrame(animate);
      // 박스를 회전
      boxMesh.rotation.x += 0.01;
      boxMesh.rotation.y += 0.01;
      // 렌더링
      renderer.render(scene, camera);
    };

    // WebGL의 호환성 체크
    if (WebGL.isWebGLAvailable()) {
      animate();
    } else {
      const warning = WebGL.getWebGLErrorMessage();
      elm?.appendChild(warning);
    }

    // 클린업 함수:이전 이펙트를 삭제, 타이머 취소 등에 사용
    return () => {
      elm?.removeChild(renderer.domElement);
    };
  }, []);

  return (
    <>
      <h1>three.js</h1>
      <div ref={mountRef} />
    </>
  );
};

export default App;
코드를 작성하고 npm start를 실행하면, 회전하는 정육면체와 파란 선, 그리고 three.js라는 텍스트가 표시된다.
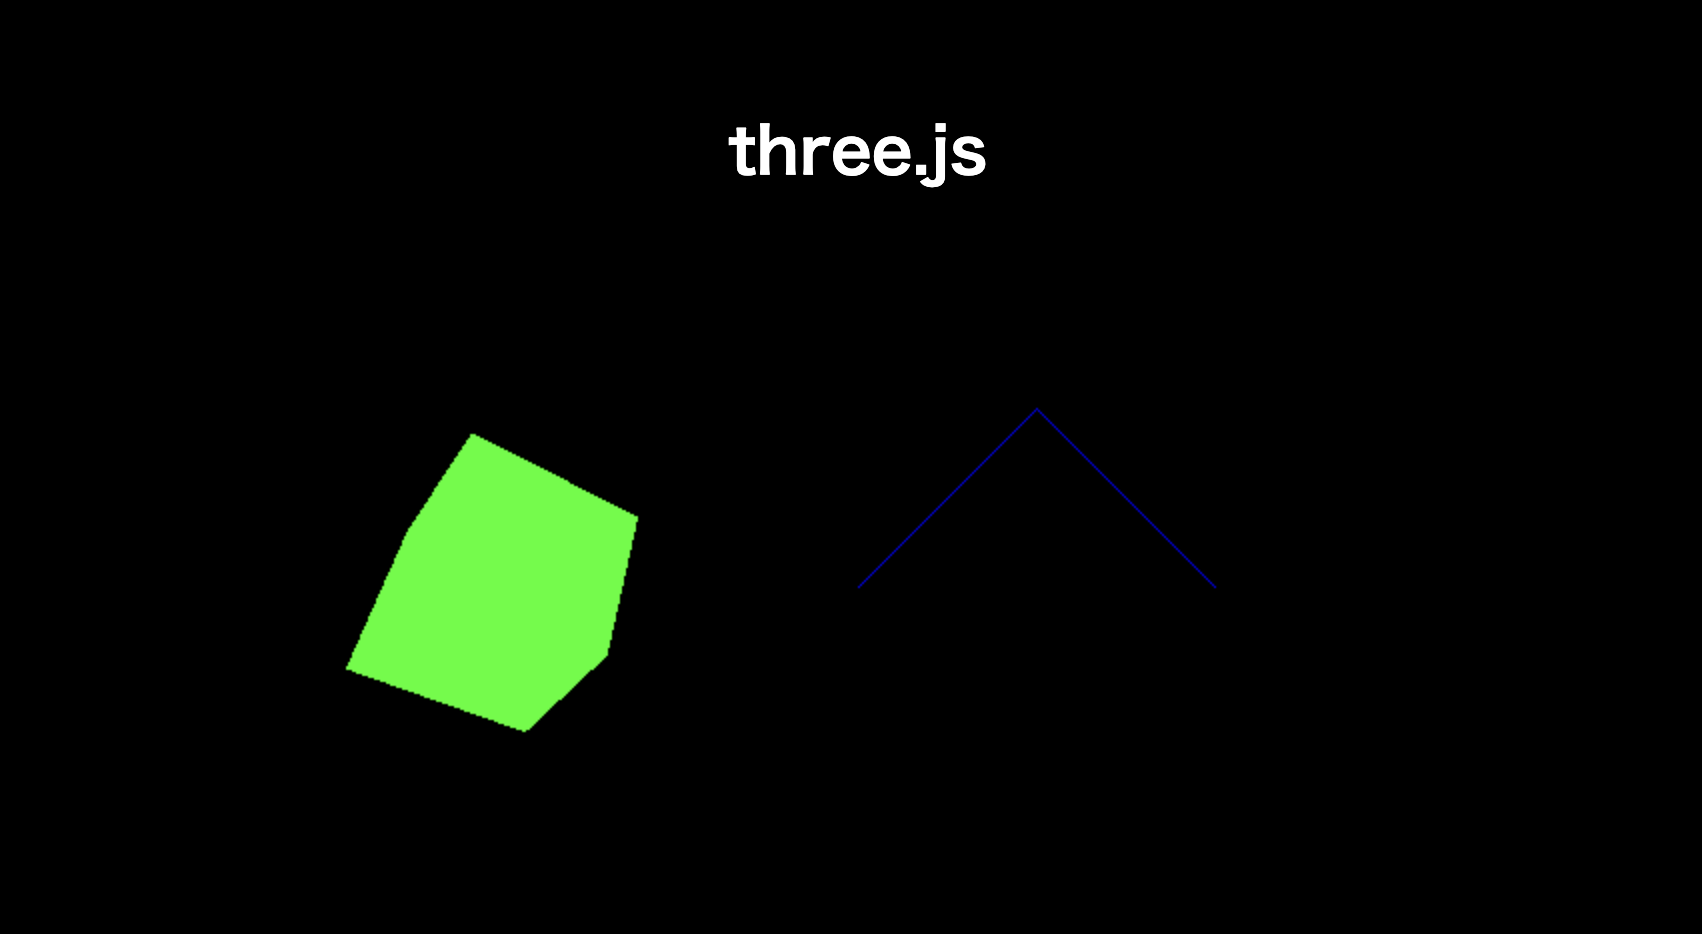
three.js는 자동 리사이징을 지원하지 않기 때문에
화면을 확대 / 축소할 경우, canvas태그 안에서 렌더링 한 결과의 크기는 그대로이다.
React Three Fiber
이제 위의 코드를 React Three Fiber로 변환해 보자.
three.js의 경우, Scene, Camera, Renderer를 다 따로 설정해주어야 한다는 점, 그리고 별도로 리사이징을 해주어야 한다는 단점이 있었다.
하지만, React Three Fiber는 three.js에 비해 비교적 간결한 코드 작성이 가능하다.
import * as THREE from "three";

import { Canvas, ThreeElements, useFrame } from "@react-three/fiber";
import React, { useEffect, useRef } from "react";

const Box = (props: ThreeElements["mesh"]) => {
  // 초기치 null에 Non-nullable어서션 연산자!를 추가함으로써, ref오브젝트의 current프로퍼티의 변경이 가능해진다.
  // null을 할당하는 것은 불가능하다.
  const meshRef = useRef<THREE.Mesh>(null!);

  useFrame(() => {
    meshRef.current.rotation.x += 0.01;
    meshRef.current.rotation.y += 0.01;
  });

  return (
    <mesh {...props} ref={meshRef}>
      <boxGeometry args={[1, 1, 1]} />
      <meshBasicMaterial color={0x00ff00} />
    </mesh>
  );
};

const Line = () => {
  const geometryRef = useRef<THREE.BufferGeometry>(null!);

  useEffect(() => {
    const points = [
      new THREE.Vector3(0, 0, 0),
      new THREE.Vector3(1, 1, 0),
      new THREE.Vector3(2, 0, 0),
    ];
    geometryRef.current.setFromPoints(points);
  }, []);

  return (
    <line>
      <bufferGeometry ref={geometryRef} />
      <lineBasicMaterial color={0x0000ff} />
    </line>
  );
};

const App = () => {
  return (
    <>
      <h1>R3F</h1>
      <Canvas
        camera={{
          fov: 75,
          aspect: window.innerWidth / window.innerHeight,
          near: 0.1,
          far: 1000,
        }}
      >
        <ambientLight />
        <directionalLight
          color={0xffffff}
          intensity={0.02}
          position={[1, 1, 1]}
        />
        <Box position={[-2, 0, 0]} />
        <Line />
      </Canvas>
    </>
  );
};

export default App;
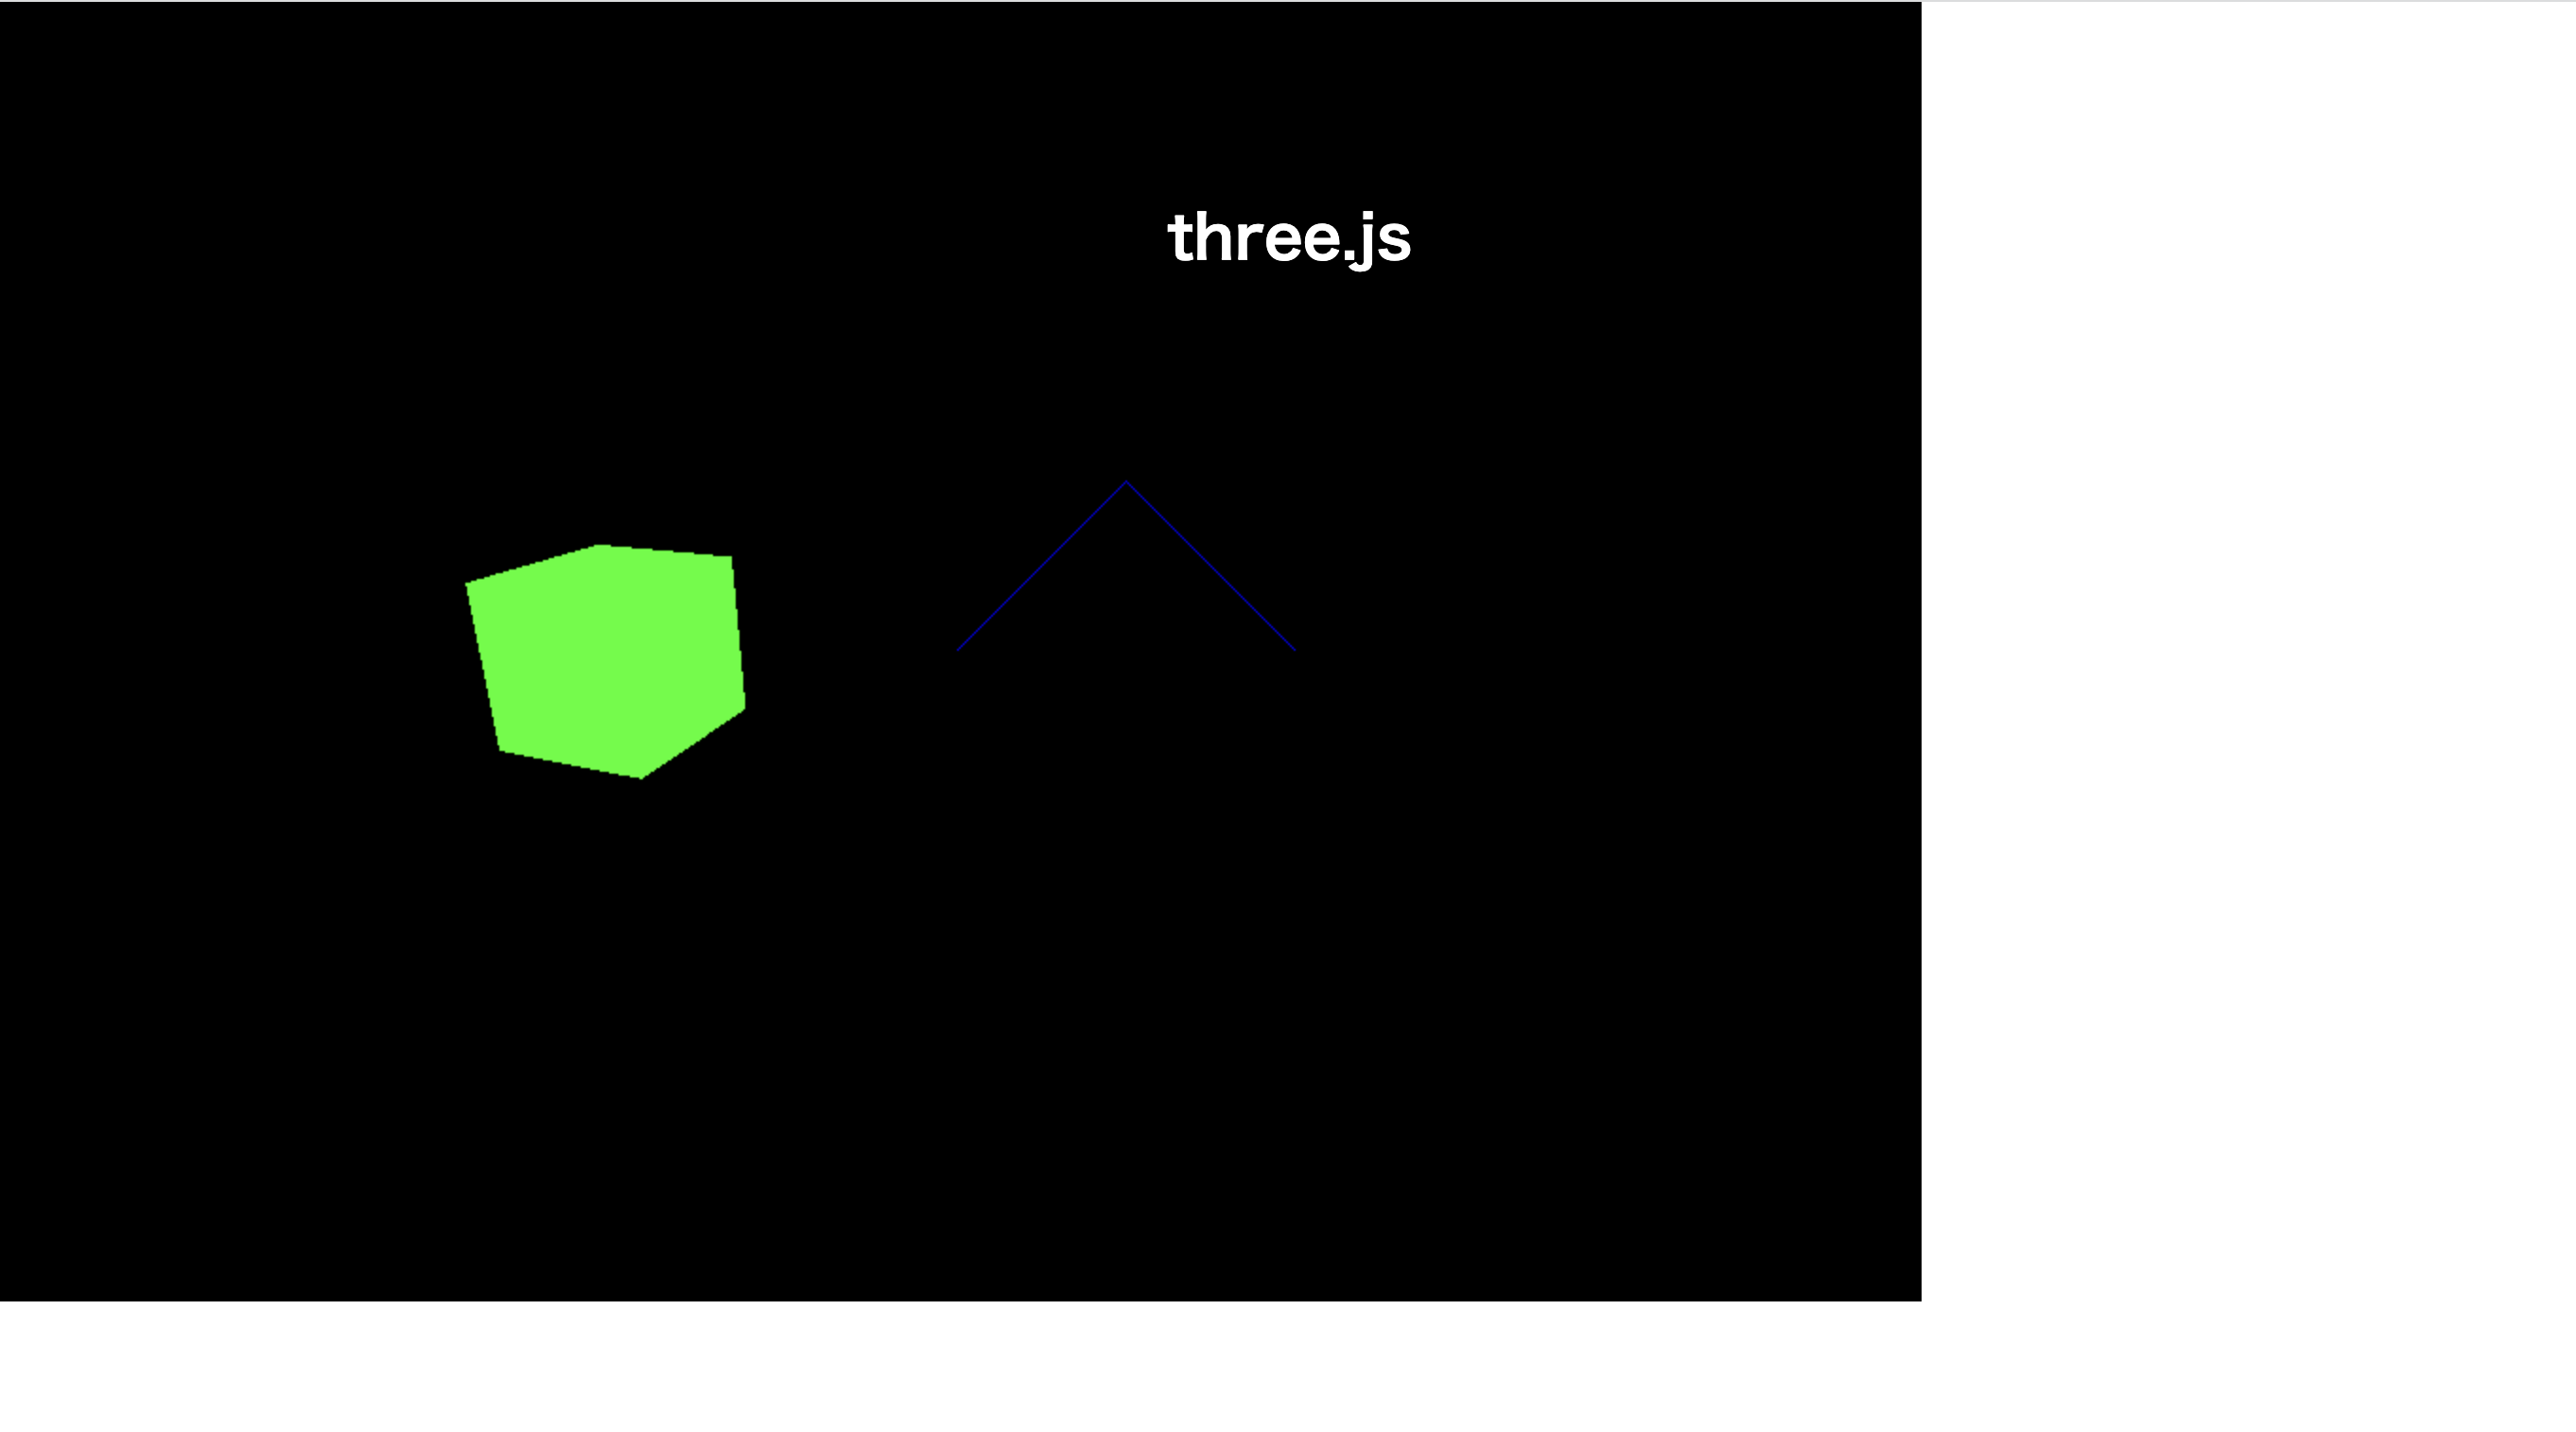
위의 코드를 작성 후, npm start를 실행하면 아까 three.js로 만든 것과 동일한 화면이 나타날 것이다.
그리고 화면을 확대 / 축소하면 거기에 맞춰 자동으로 리사이징이 되는 것을 알 수 있다.

つづく
'개발 > React : React Three Fiber' 카테고리의 다른 글
| 【React Three Fiber】#03 카메라: Orthographic Camera, OrbitControls (0) | 2023.08.27 |
|---|---|
| 【React Three Fiber】#02 카메라: Perspective Camera (0) | 2023.08.27 |
| 【React Three Fiber】#06 화면 리사이징 하기, 더블 클릭 시 전체 화면 모드로 변경하기 (0) | 2022.10.13 |
| 【React Three Fiber】#03 애니메이션 구현하기 (0) | 2022.09.29 |
| 【React Three Fiber】#02 오브젝트 변형하기 (0) | 2022.09.26 |